

Introduction
Django is a popular, high-level Python web framework that enables developers to build robust, scalable web applications with ease. This guide will walk you through each step of creating a Django app from scratch, covering the setup, development, and common troubleshooting tips, including how to handle the error message CommandError: no installed app with label '-'.
Prerequisites
Before starting, make sure you have the following installed on your system:Step-by-step guide to creating a Django app, with solutions for common errors like ‘Django dumpdata ommandError: no installed app with label -‘.”
- Python: Download and install the latest version of Python from Python’s official website.
- Django: Install Django via pip (Python’s package manager) by running
pip install Djangoin your terminal or command prompt.
Step 1: Set Up the Django Project
- Open your terminal or command prompt and navigate to the directory where you want to create your Django project.
- Use the following command to create a new Django project:
Step 2: Create a Django App
- Move into the project directory by running:
- Create a new Django app using the following command:
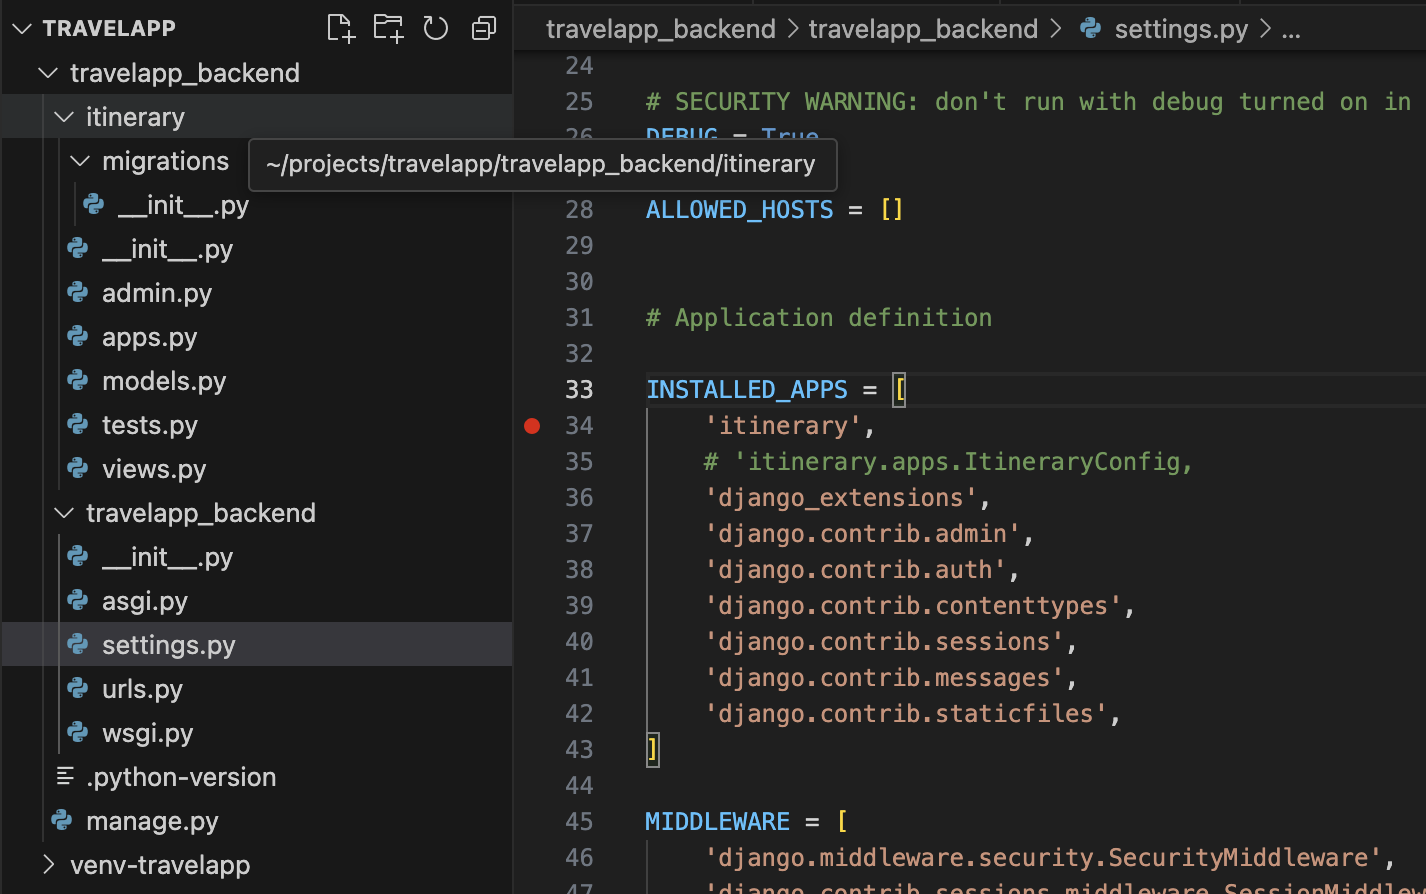
Step 3: Register the App in Settings
- Open the
settings.pyfile located in the project folder. - Find the
INSTALLED_APPSlist and add your app’s name to enable it in the Django project:
Step 4: Create Models (Optional)
- Define the app’s models in the
models.pyfile inside your app folder. Django’s ORM (Object-Relational Mapping) will handle the database tables. - After defining the models, create the corresponding database tables by running:
python manage.py makemigrations
python manage.py migrate
Step 5: Define Views
- Define views in the
views.pyfile inside your app’s folder. Views handle HTTP requests and return appropriate responses. - Use function-based or class-based views depending on your app’s needs.
Step 6: Set Up URL Patterns
- Create URL patterns in the
urls.pyfile within your app folder. - Map the URLs to the views by defining routes and linking them with Django’s URL configuration.
Step 7: Add Templates (Optional)
- If you’re working with HTML templates, create a
templatesfolder inside the app directory. - Place your HTML files within this folder and reference them in your views using Django’s template system.
Step 8: Static Files (Optional)
- For static assets like CSS, JavaScript, or images, create a
staticfolder inside your app directory. - Add your static files here, and use them in templates by loading them in the HTML files.
Step 9: Run and Test Your App
- Start the development server by running:
- Open a browser and go to
http://127.0.0.1:8000/to see your app in action!
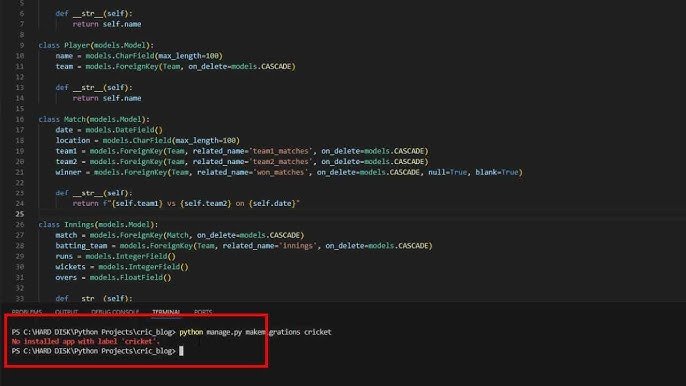
Troubleshooting: Resolving the “CommandError: No Installed App with Label ‘-‘” Error
While working with Django, you may encounter the error message: CommandError: no installed app with label '-'. This issue often arises if:
- The app name specified in a command or configuration contains typos.
- The app hasn’t been correctly added to
INSTALLED_APPSin thesettings.pyfile.
To fix this error:
- Double-check that you have correctly typed the app name in the command and in
INSTALLED_APPS. - Ensure that the app folder is correctly structured with an
__init__.pyfile (this file signifies that it’s a valid Python package). - Restart the server if necessary to clear any cached configurations.
- See full details here clubneet.
Conclusion
Building a Django app involves setting up a project, creating an app, and configuring components like models, views, and templates. With Django’s structured approach, you can swiftly develop complex web applications. The steps above also include common troubleshooting tips to streamline your development process and avoid potential issues. Happy coding!